Hoover WindTunnel vacuums are known for their powerful suction and advanced cleaning features, but like any appliance, they can face issues like low suction or mechanical failures.
This guide provides step-by-step solutions to common problems, helping you identify and fix issues efficiently, ensuring your vacuum operates at peak performance.
Regular maintenance and troubleshooting can extend the lifespan of your Hoover WindTunnel, saving you time and money on costly repairs or replacements.
1.1 Overview of the Hoover WindTunnel Vacuum
The Hoover WindTunnel vacuum is a popular choice for its powerful suction and advanced cleaning features. Designed with a unique WindTunnel technology, it lifts dirt and debris effectively, ensuring a deep clean. Available in various models, including upright, canister, and handheld designs, it caters to diverse cleaning needs. Known for its lightweight construction and ease of use, the WindTunnel series often includes features like adjustable settings, HEPA filtration, and detachable tools. Despite its robust performance, users may encounter issues like clogged hoses or filter blockages, which can be resolved with proper maintenance and troubleshooting.
1.2 Importance of Regular Maintenance
Regular maintenance is crucial for optimal performance and longevity of the Hoover WindTunnel vacuum. Over time, filters can clog, reducing suction power, while blockages in hoses or elbows impair airflow. By emptying the dirt cup, cleaning filters, and inspecting for wear, users can prevent common issues. Neglecting maintenance may lead to decreased efficiency or even mechanical failure, requiring costly repairs or replacement. A well-maintained vacuum ensures consistent cleaning results and extends its lifespan, making routine upkeep an essential part of ownership.
Common Issues with Hoover WindTunnel Vacuums
Common issues with Hoover WindTunnel vacuums include low suction, power failures, blockages, and brush roll malfunctions. These problems can hinder cleaning efficiency and effectiveness.
2.1 No Suction or Low Suction Power
A common issue with Hoover WindTunnel vacuums is reduced or no suction, often caused by blockages in the hose, filters, or elbow. Over time, debris accumulation can restrict airflow, leading to weak performance. Additionally, a dirty or clogged filter can significantly impact suction power. Regular cleaning and maintenance of these components are essential to restore optimal functionality. Checking for blockages and ensuring filters are clean can often resolve the issue without professional intervention.
2.2 Vacuum Not Turning On
If your Hoover WindTunnel vacuum fails to turn on, start by checking the power connection. Ensure the plug is securely inserted into a functioning outlet. A faulty electrical component, such as a damaged switch or broken cord, could prevent the vacuum from powering on. Additionally, a tripped circuit breaker or blown fuse in your home’s electrical system might be the cause. Inspect the vacuum’s power cord for any visible damage or frays. If the issue persists, consider consulting a professional for further diagnosis and repair.
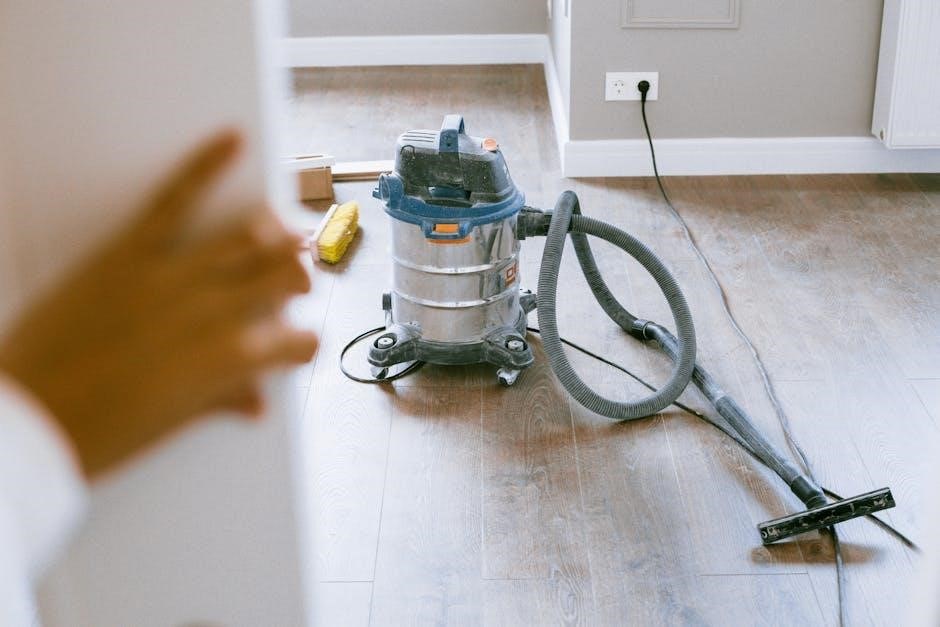
2.3 Blockages in the Hose or Elbow
Blockages in the hose or elbow are common issues that can significantly reduce suction power. Large debris or tangled hair may obstruct airflow, preventing the vacuum from functioning properly. To resolve this, disconnect the hose and inspect it thoroughly for any visible obstructions. Use a long, thin object or a cleaning tool to remove blockages. Additionally, check the elbow connector for dust buildup or lodged particles. If the hose is torn or damaged, consider replacing it to restore optimal performance. Regular cleaning can help prevent such issues from recurring.
2.4 Brush Roll Not Spinning
A non-spinning brush roll can significantly hinder the vacuum’s cleaning performance. This issue often arises due to a broken or worn-out belt, which drives the brush roll. Inspect the belt for signs of damage or wear and replace it if necessary. Additionally, check for blockages around the brush roll, as tangled hair or debris can prevent it from spinning freely. Ensure the brush roll is clean and free of obstructions. If the problem persists, consult the user manual or consider professional repair to restore proper function.

Troubleshooting Steps for No Suction
Check and clean filters, inspect the hose for blockages, empty the dirt cup, and clean the collection tank screen filter to restore suction power effectively.
3.1 Checking and Cleaning the Filters
Start by turning off and unplugging your Hoover WindTunnel vacuum for safety. Locate the pre-motor and post-motor filters, which are essential for maintaining suction power and air quality.
Gently remove the filters and inspect for dust, debris, or blockages. Clean washable filters with mild soap and water, allowing them to dry completely before reinstalling. If damaged or excessively dirty, replace them with genuine Hoover parts. Regular filter maintenance ensures optimal performance and prevents suction loss. Always refer to your user manual for specific filter locations and cleaning instructions.
3.2 Inspecting the Hose for Blockages
Detach the hose from the vacuum and examine it thoroughly for any visible obstructions. Check for kinks, twists, or compression in the hose that could restrict airflow.
Use a broom handle or similar tool to gently sweep through the hose and dislodge any blockages. If the issue persists, inspect the elbow connector for debris or damage.
After cleaning, reattach the hose securely and test the vacuum to ensure proper suction has been restored. Regularly inspecting the hose helps maintain your Hoover WindTunnel’s performance and prevents suction loss.
3.3 Emptying the Dirt Cup or Dustbin
Regularly emptying the dirt cup or dustbin is essential for maintaining your Hoover WindTunnel’s suction power. Locate the release latch on the dirt container and press it to remove the cup.
Dispose of collected debris in a trash can. If your model has a washable filter, rinse it with cold water and allow it to dry completely before reattaching.
Reattach the dirt cup securely to ensure proper function. A full or clogged dirt cup can significantly reduce your vacuum’s performance, so empty it after each use for optimal results.
3.4 Cleaning the Collection Tank Screen Filter
To clean the collection tank screen filter, first locate it at the top or side of the dirt cup. Remove it by gently pulling or twisting, depending on your model.
Rinse the filter with cold water to remove dust and debris. Use a soft brush to scrub away stubborn particles. Allow it to air dry completely before reinstalling.
A clogged screen filter can reduce suction power, so regular cleaning is crucial. Reattach it securely to ensure proper function and maintain your vacuum’s performance.

Solving Power-Related Issues
Power-related problems often stem from electrical faults or improper connections. Ensure the vacuum is plugged into a working outlet and check for damaged cords or switches.
4.1 Ensuring Proper Power Connection
Start by verifying that the Hoover WindTunnel vacuum is properly plugged into a functioning electrical outlet. Ensure the plug is fully inserted and not loose.
Check the power cord for any visible damage, such as cuts or frays, which could prevent the vacuum from receiving power. If the cord is damaged, it may need replacement.
Additionally, confirm that the outlet is working by testing it with another appliance. If the vacuum still doesn’t turn on, the issue may lie with the electrical components.
4.2 Checking for Faulty Electrical Components
If the Hoover WindTunnel vacuum doesn’t turn on, check the power switch for proper function. Ensure it is clean and free from debris that might prevent it from engaging.
Inspect the circuit breaker or fuse box to confirm the outlet’s power supply is not interrupted. If the issue persists, examine the vacuum’s internal electrical components, such as the motor or wiring, for damage or wear.
For safety, always unplug the vacuum before inspecting internal parts. If you identify faulty components, consider consulting a professional or replacing the parts as needed.
Addressing Blockages and Clogs
Blockages in the hose or elbow can significantly reduce suction power. Regularly inspect and clear debris from these areas to ensure optimal airflow and performance.
5.1 Locating and Clearing Blockages in the Hose
To locate blockages, disconnect the hose from the vacuum and inspect it thoroughly. Check for visible debris or kinks that may restrict airflow.
Use a broom handle or similar tool to gently push through stubborn clogs. For severe blockages, remove the hose elbow and clean it separately.
Regularly cleaning the hose ensures optimal suction power and prevents future clogs, keeping your Hoover WindTunnel performing efficiently.
5.2 Checking the Cleaner Head and Handle Connection
Inspect the connection between the cleaner head and handle for any blockages or obstructions, such as debris or objects lodged in the hinge.
Gently remove any blockages using a soft brush or cloth. Ensure the connection is secure, as a loose fit can reduce suction power.
Regularly cleaning this area prevents clogs and ensures smooth operation, maintaining your Hoover WindTunnel’s efficiency and performance.

Maintaining and Replacing Filters
Regularly cleaning or replacing filters ensures optimal performance and prevents suction loss. Dirty filters can cause inefficiency, so check and maintain them as recommended.
6.1 Understanding the Role of Filters
Filters play a crucial role in maintaining your Hoover WindTunnel vacuum’s performance by trapping dust, dirt, and allergens, ensuring clean air circulation and preventing internal damage.
The pre-motor filter protects the motor from debris, while the post-motor filter captures fine particles, improving air quality and suction power. Clean or replace filters regularly for optimal function.
6.2 Cleaning or Replacing Pre-Motor and Post-Motor Filters
Regularly cleaning or replacing the pre-motor and post-motor filters is essential for maintaining your Hoover WindTunnel’s efficiency. Turn off and unplug the vacuum before starting.
For the pre-motor filter, remove it and tap gently to eliminate dust. Some filters can be washed with cold water, but ensure they are completely dry before reinstalling.
The post-motor filter, often located near the exhaust, may need replacement if damaged or excessively dirty. Always refer to your user manual for specific guidance.

Belt Replacement and Brush Roll Maintenance
Regularly inspect the belt for wear or damage. Replace it if cracked or broken to ensure the brush roll spins smoothly and maintains optimal cleaning performance.
7;1 Identifying Worn or Broken Belts
A worn or broken belt in your Hoover WindTunnel vacuum can cause the brush roll to stop spinning, reducing cleaning efficiency. Look for visible cracks, frays, or breaks in the belt. If the belt is damaged, it may also produce a burning smell or loud noise. To inspect, remove the vacuum’s bottom plate and examine the belt. Even if it appears intact, check for stretchiness or slippage, which can hinder performance. Regular inspections help prevent unexpected breakdowns and maintain optimal cleaning results.
7.2 Replacing the Belt Step-by-Step
To replace the belt on your Hoover WindTunnel vacuum, start by turning it off and unplugging it. Remove the bottom plate to access the brush roll and belt. Take out the old belt and discard it. Install the new belt around the motor and brush roll, ensuring it aligns properly. Reassemble the vacuum by replacing the bottom plate and tightening the screws. Test the vacuum to ensure the brush roll spins smoothly. Always refer to your user manual for specific instructions, as steps may vary slightly by model.
Error Codes and LED Indicators
Error codes and LED indicators on Hoover WindTunnel vacuums help diagnose issues. These lights or codes signal problems like blockages, full dustbins, or faulty components. Always consult the user manual for specific code meanings and solutions to resolve issues quickly and effectively.
8.1 Understanding Common Error Codes
Hoover WindTunnel vacuums use error codes and LED indicators to signal specific issues. Common codes include alerts for blockages, full dustbins, or faulty filters. These codes guide users to specific problems, such as clogged hoses or worn belts. Consulting the user manual is essential to interpret each code accurately. For example, a flashing red light may indicate a full dirt cup, while a solid red light could signal a blockage. Understanding these codes helps users address issues promptly, ensuring the vacuum operates efficiently and effectively. Regular checks and maintenance can prevent many of these errors from occurring. Always refer to the manual for detailed solutions.
8.2 Resetting the Vacuum After an Error
After identifying and addressing the error, reset your Hoover WindTunnel by unplugging it from the power source. Allow the vacuum to cool for 30 minutes to reset internal components. Plug it back in and test operation. If the error persists, ensure all parts are clean and properly assembled. For models with reset buttons, locate it (usually near the power switch) and press firmly until the LED indicates normal operation. Always consult the user manual for specific reset instructions tailored to your model.
General Maintenance Tips
Regularly clean filters, empty the dirt cup, and inspect for blockages to maintain optimal performance. Store the vacuum in a dry, cool place to prevent damage.
Check belts and brushes for wear and replace them as needed. Keep hoses and connections tight to ensure proper suction and functionality over time.
9.1 Regular Cleaning of Components
Regularly cleaning your Hoover WindTunnel’s components is essential for maintaining performance. Start by emptying the dirt cup after each use to prevent dust buildup. Check and clean the pre-motor and post-motor filters, as clogged filters can reduce suction power. Use a soft brush or cloth to remove debris from the vacuum’s exterior and internal parts. Inspect the hose and wand for blockages and clear them promptly. Cleaning the collection tank screen filter ensures proper airflow and prevents motor strain. Consistent upkeep keeps your vacuum running efficiently and prolongs its lifespan. Schedule these tasks weekly for optimal results.
9.2 Storing the Vacuum Properly
Proper storage of your Hoover WindTunnel vacuum ensures longevity and prevents damage. Always store it in a dry, cool place, away from direct sunlight and moisture. Before storing, empty the dirt cup, clean the filters, and ensure all parts are dry to prevent mold growth. Wind the cord neatly around the vacuum or use a cord hook to avoid tangling. Store the vacuum upright to save space and maintain balance. Keep it away from children and pets to prevent accidental damage. Regularly inspect stored accessories like hoses and brushes for signs of wear. Proper storage maintains performance and readiness for future use.