Warm tile thermostats offer precise temperature control for radiant floor heating‚ enhancing comfort and energy efficiency. They are becoming increasingly popular for modern homes.
These devices regulate electric or hydronic systems‚ providing consistent warmth and customizable schedules. Understanding their features is key to optimal performance.
From smartphone control to adaptive learning‚ warm tile thermostats deliver convenience and savings. This guide will help you navigate installation and operation.
What are Warm Tile Thermostats?
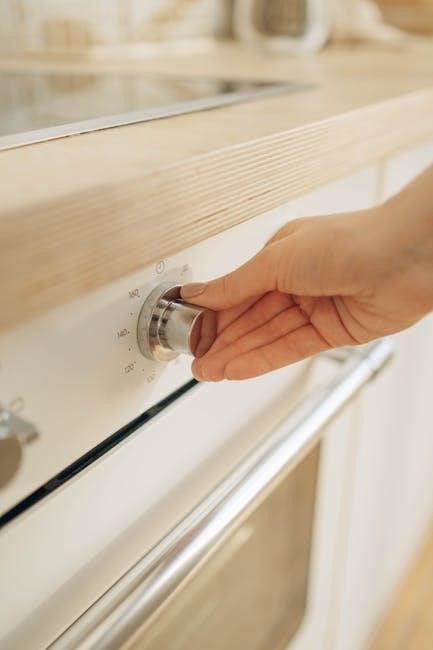
Warm tile thermostats are specialized control systems designed to manage radiant floor heating‚ commonly installed beneath tile‚ stone‚ or other hard flooring materials. Unlike traditional thermostats that regulate air temperature‚ these devices directly monitor and control the temperature of the floor itself‚ providing a more consistent and comfortable heating experience.
They function by sensing the floor temperature through a sensor‚ typically embedded within the tile or subfloor‚ and then regulating the power supplied to the heating elements. Modern warm tile thermostats often incorporate programmable features‚ allowing users to set schedules and temperatures based on their preferences and occupancy patterns. This leads to significant energy savings and enhanced comfort.
These thermostats come in various forms‚ from basic manual models to sophisticated digital versions with smartphone connectivity and advanced control options.
Benefits of Using a Warm Tile Thermostat
Warm tile thermostats offer a multitude of advantages beyond simple comfort. Primarily‚ they provide consistent and even heating‚ eliminating cold spots often associated with traditional forced-air systems. This is particularly beneficial for bathrooms and kitchens‚ creating a luxurious and welcoming environment.
Energy efficiency is a key benefit; by directly heating the floor‚ less energy is wasted heating air that rises to the ceiling. Programmable schedules allow for customized heating zones‚ further reducing energy consumption when rooms are unoccupied.
Increased home value and improved comfort are additional perks. Modern thermostats with remote control and voice integration offer unparalleled convenience and control over your home’s heating system.
Understanding Your Thermostat
This section details the core components‚ display functions‚ and essential safety guidelines for your warm tile thermostat. Familiarization ensures optimal and safe operation.
Thermostat Components and Their Functions
The thermostat’s core is the control unit‚ housing the processor and interface. A key component is the temperature sensor‚ accurately measuring floor or room temperature. Many models utilize a floor sensor for precise heating control‚ preventing overheating and ensuring comfort.
The display panel shows current temperature‚ setpoints‚ and operating mode. Buttons or a touchscreen allow for adjustments. A relay switch controls power to the heating element. Some thermostats include a built-in GFCI (Ground Fault Circuit Interrupter) for safety.
Advanced units feature Wi-Fi modules for remote access and adaptive learning algorithms to optimize performance. Understanding each component’s role is crucial for troubleshooting and maximizing efficiency.
Display and Interface Overview
The thermostat’s display typically shows the current floor temperature‚ setpoint temperature‚ and operating mode (Heat‚ Cool‚ Off‚ Auto). Icons indicate Wi-Fi connectivity‚ heating status‚ and any active alerts. Brightness adjustments are often available for optimal visibility.
The interface can be button-based or touchscreen. Buttons usually control temperature up/down‚ mode selection‚ and schedule access. Touchscreens offer intuitive navigation through menus and settings. A menu button accesses advanced options like calibration and programming.
Navigating the interface involves understanding the icons and menu structure. Refer to the specific model’s diagram for button functions. A clear display and user-friendly interface are essential for convenient operation.
Safety Precautions
Electrical Safety: Always disconnect power at the breaker before installation or maintenance. Incorrect wiring can cause fire or electric shock. Ensure the thermostat is properly grounded. Do not operate with damaged wiring or components.
Temperature Limits: Never exceed the thermostat’s maximum temperature rating. Overheating can damage flooring and pose a burn risk. Regularly check floor temperature to prevent discomfort or hazards.
Water Exposure: Avoid exposing the thermostat to water or excessive moisture. This can cause short circuits and malfunction. If exposed‚ disconnect power immediately. Professional Installation: For complex systems‚ consult a qualified electrician.

Installation Guide
Proper installation ensures optimal performance and safety. This section details tools‚ wiring‚ mounting‚ and initial setup for your warm tile thermostat system.
Tools Required for Installation
Before beginning the installation process‚ gather all necessary tools to ensure a smooth and efficient experience. A standard screwdriver set – including Phillips and flathead – is essential for securing the thermostat and wiring connections.
Wire strippers are crucial for preparing the electrical wires‚ removing insulation without damaging the conductors. A non-contact voltage tester verifies power is off before handling wires‚ prioritizing safety. Pliers‚ both standard and needle-nose‚ assist with bending and manipulating wires within the junction box.
A level ensures the thermostat is mounted straight for accurate readings and a professional appearance. A drill with appropriate drill bits is needed for mounting the thermostat to the wall. Finally‚ electrical tape provides insulation and secure connections. Consider a multimeter for testing continuity and voltage if needed.
Wiring Diagram and Connections
Carefully consult the wiring diagram included with your specific thermostat model. Typically‚ you’ll identify line (hot)‚ neutral‚ and load wires. The line and neutral wires provide power to the thermostat‚ while the load wires connect to the heating element.
Connect the line wire to the designated ‘L’ terminal‚ the neutral to ‘N’‚ and the load wires to the appropriate output terminals. If a floor sensor is used‚ connect its wires to the designated sensor terminals‚ often labeled ‘S1’ and ‘S2’.
Ensure all connections are secure and that no bare wire is exposed. Use wire connectors or terminal blocks for safe and reliable connections. Double-check the wiring against the diagram before proceeding. Incorrect wiring can damage the thermostat or heating system.
Mounting the Thermostat
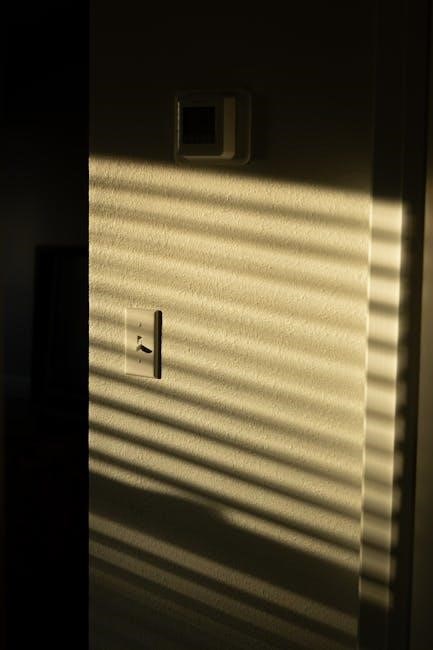
Select a suitable location for the thermostat‚ ideally on a wall away from direct sunlight‚ drafts‚ and moisture. Ensure the location is easily accessible for operation and programming. Mark the mounting holes using the thermostat’s backplate as a template.
Drill pilot holes at the marked locations and insert appropriate wall anchors if necessary‚ especially for drywall installations. Secure the backplate to the wall using the provided screws. Carefully align the thermostat body with the backplate and snap it into place;
Verify the thermostat is firmly mounted and level. Avoid overtightening the screws‚ which could damage the thermostat or wall. A secure mount ensures accurate temperature sensing and reliable operation.
Initial Power-Up and Setup
After mounting‚ restore power to the thermostat via the circuit breaker. The display should illuminate‚ initiating the startup sequence. The thermostat may prompt you to select your preferred language and units (Celsius or Fahrenheit).
Follow the on-screen instructions to configure basic settings‚ including the current time and date. Accurate timekeeping is crucial for scheduling functions. Next‚ the thermostat will likely guide you through a floor sensor calibration process‚ if applicable.
This calibration ensures accurate temperature readings from the floor. Confirm all settings before proceeding. A successful initial setup is vital for optimal performance and user experience.
Programming Your Thermostat
Efficiently manage your comfort with programmable schedules! Set desired temperatures for different times and days‚ optimizing warmth and reducing energy consumption.
Explore comfort‚ eco‚ and away modes for tailored heating. Override functions allow temporary adjustments without disrupting your established program.
Setting the Current Time and Date
Accurate time and date settings are crucial for proper scheduling and operation of your warm tile thermostat. Upon initial power-up‚ or after a power outage‚ the thermostat will likely prompt you to set these parameters.
Navigate to the “Settings” menu‚ typically accessed via a button labeled “Menu” or a gear icon on the thermostat’s display. Within the settings‚ locate the “Time & Date” option.
Use the up and down arrow buttons‚ or a similar interface‚ to adjust the hour and minute. Confirm your selection; Repeat this process for setting the month‚ day‚ and year.
Ensure you select the correct AM/PM designation. Some thermostats may offer a 24-hour clock format option. Save your changes to finalize the time and date configuration. Proper settings ensure your heating schedules function as intended.
Creating Heating Schedules
Heating schedules allow you to automate your warm tile system‚ optimizing comfort and energy savings. Access the “Schedule” or “Program” menu on your thermostat. Most models support multiple schedules for different days of the week.
Begin by selecting a day (e.g.‚ Monday). Define a “period” – a specific time block with a desired temperature. For example‚ set a “Wake” period at 7:00 AM with a comfortable temperature.
Add subsequent periods like “Away” (lower temperature during work hours)‚ “Return” (comfortable temperature before you come home)‚ and “Sleep” (lower temperature overnight).
Repeat this process for each day‚ or copy schedules to simplify setup. Review your schedule carefully to ensure it aligns with your lifestyle. Save the schedule to activate it.
Understanding Different Heating Modes (e.g.‚ Comfort‚ Eco‚ Away)
Warm tile thermostats typically offer several pre-set heating modes to simplify operation. Comfort mode provides consistent warmth at your preferred temperature‚ ideal for occupied spaces. Eco mode lowers the temperature slightly‚ reducing energy consumption while maintaining a comfortable baseline.
Away mode is designed for extended periods of absence‚ setting a significantly lower temperature to minimize energy waste. Some thermostats also feature a “Vacation” mode for longer trips.
These modes can be selected manually or integrated into your heating schedules. Experiment with each mode to find the optimal balance between comfort and energy efficiency. Refer to your thermostat’s display for current mode indication.
Override Functionality and Temporary Adjustments
Warm tile thermostats often include an “Override” function‚ allowing temporary adjustments to the programmed schedule. This is useful for unexpected changes in occupancy or comfort preferences. Activating the override typically raises or lowers the temperature for a specified duration.

The override duration can often be customized within the thermostat settings – options might include 2‚ 4‚ or 8 hours‚ or until the next scheduled program point. After the override period‚ the thermostat automatically reverts to the original schedule.
Temporary adjustments can also be made directly via the thermostat interface‚ without activating the override. These changes are usually only effective until the next scheduled event.

Advanced Features
Warm tile thermostats boast smart capabilities like remote control via smartphone apps‚ voice assistant integration‚ and adaptive learning for personalized comfort and energy savings.
Remote Control via Smartphone App
Many warm tile thermostats offer seamless integration with smartphone applications‚ providing unparalleled control and convenience. Download the manufacturer’s app (available on iOS and Android) and follow the pairing instructions – typically involving connecting to your home’s Wi-Fi network.
Once connected‚ you can adjust the temperature‚ create schedules‚ and monitor energy usage from anywhere with an internet connection. This feature is ideal for adjusting the heat before you arrive home‚ or ensuring energy isn’t wasted when you’re away.
The app often displays real-time temperature readings and allows for quick adjustments‚ overriding programmed schedules as needed. Push notifications can alert you to temperature changes or system errors‚ enhancing peace of mind and proactive maintenance.
Voice Control Integration (e.g.‚ Alexa‚ Google Assistant)
Modern warm tile thermostats frequently support voice control through popular virtual assistants like Amazon Alexa and Google Assistant. To enable this feature‚ link your thermostat’s app account to your preferred voice assistant platform within their respective apps.
Once linked‚ you can control your heating system using simple voice commands. For example‚ “Alexa‚ set the bathroom temperature to 72 degrees” or “Hey Google‚ increase the living room heat by two degrees.” This hands-free operation adds a layer of convenience‚ especially when your hands are full.
Ensure your voice assistant device is properly configured and connected to the same Wi-Fi network as your thermostat for reliable performance. Explore the app for a complete list of supported voice commands.
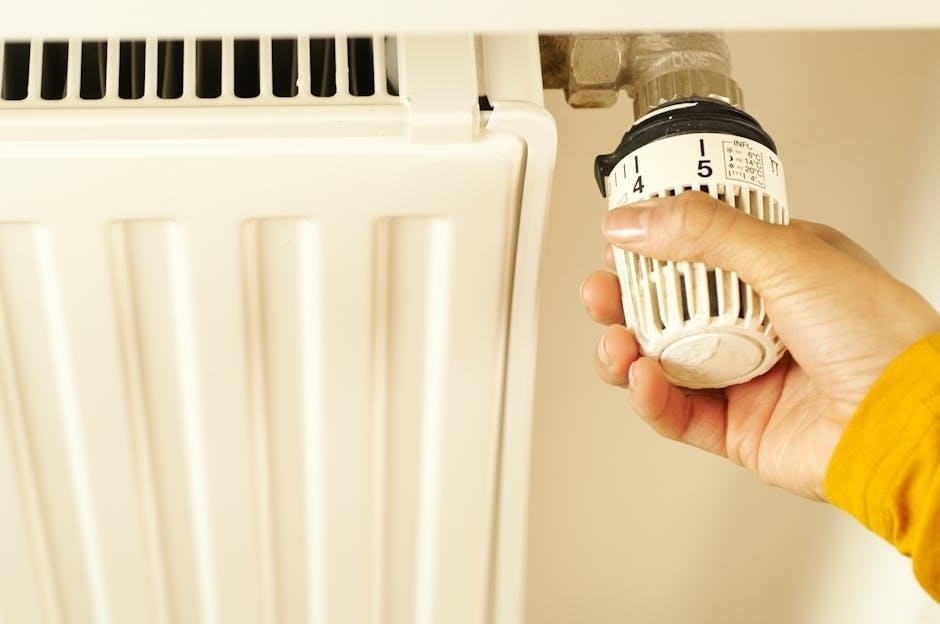
Floor Sensor Calibration
Accurate floor temperature readings are crucial for efficient and comfortable radiant heating. Your warm tile thermostat utilizes a floor sensor to prevent overheating and optimize performance. Calibration ensures the sensor provides precise data to the thermostat’s control algorithm.
Access the calibration menu within the thermostat’s settings‚ typically through the app or on-device interface. Compare the sensor reading to a known accurate thermometer placed directly on the tile surface. Adjust the calibration value until the thermostat displays the same temperature.
Regular calibration‚ especially after installation or significant floor changes‚ maintains optimal system efficiency and prevents unnecessary energy consumption. Consult the thermostat’s manual for specific calibration instructions.
Adaptive Learning Technology
Advanced warm tile thermostats often incorporate adaptive learning technology‚ a smart feature that optimizes heating schedules based on your usage patterns and environmental factors. This system learns how long it takes to heat your floor and maintains your desired temperature efficiently.
The thermostat monitors your adjustments and preferences over time‚ predicting when you’ll want heat and proactively adjusting the schedule. This minimizes energy waste and ensures consistent comfort without manual intervention. Initial learning typically takes several days or weeks.
To maximize effectiveness‚ avoid frequent‚ drastic schedule changes during the learning phase. Allow the thermostat to establish a baseline before making significant adjustments.
Troubleshooting Common Issues
Common problems include power failures‚ heating malfunctions‚ inaccurate readings‚ and app connectivity issues. This section provides solutions for quick diagnosis and resolution.
Thermostat Not Powering On

If your thermostat fails to power on‚ begin by verifying the power source. Ensure the circuit breaker controlling the thermostat is not tripped and is functioning correctly. Check the wiring connections at both the thermostat and the power supply‚ confirming they are secure and undamaged.
Inspect the thermostat’s display for any signs of a blown fuse or damaged components. If the unit utilizes batteries‚ replace them with fresh ones‚ ensuring correct polarity. A faulty transformer can also prevent power-up; test its output voltage if accessible.
If these steps don’t resolve the issue‚ consult a qualified electrician to rule out electrical problems within your home’s wiring. Always disconnect power before inspecting wiring.
Heating Not Activating
If the thermostat displays a set temperature but the heating isn’t activating‚ first confirm the system is in “Heat” mode and the setpoint is higher than the current room temperature. Verify the floor sensor is properly connected and functioning; a faulty sensor can prevent heating activation.
Check the circuit breaker dedicated to the heating system itself‚ separate from the thermostat’s power supply. Inspect the wiring connections at the heating element or manifold‚ ensuring they are secure. A tripped ground fault circuit interrupter (GFCI) can also halt operation.
If issues persist‚ consult a qualified technician to assess the heating element or manifold for potential failures.
Incorrect Temperature Readings
If your warm tile thermostat displays an inaccurate temperature‚ the first step is to verify the floor sensor’s placement. It should be embedded within the heating cables‚ ideally midway between them‚ and covered with thermal paste for optimal contact. Ensure the sensor isn’t directly exposed to drafts or external heat sources.
Check the thermostat’s settings for calibration options; some models allow manual temperature adjustments. A faulty sensor can also cause inaccurate readings‚ requiring replacement. Confirm the sensor wiring is secure and free from corrosion.
Consider ambient temperature fluctuations; significant changes can temporarily affect readings. If problems continue‚ contact a professional for assistance.
Connectivity Problems with App
Experiencing issues connecting your warm tile thermostat to the smartphone app? First‚ confirm your home Wi-Fi network is functioning correctly and the thermostat is within range. Restart both your router and the thermostat – a simple reboot often resolves connection hiccups.
Verify the app is updated to the latest version. Double-check that you’re using the correct Wi-Fi password during setup. If the thermostat still won’t connect‚ try the “forget network” and re-pairing process within the app.
Firewall settings or network security protocols might be blocking communication. Consult your router’s manual or contact your internet service provider for assistance.

Maintenance and Care
Regular cleaning with a soft cloth ensures optimal performance; Check for software updates periodically to maintain functionality and security. Battery replacement‚ if applicable‚ is crucial.
Cleaning the Thermostat
Maintaining a clean thermostat is essential for accurate operation and longevity. Before cleaning‚ always ensure the thermostat is powered off or disconnected from its power source to prevent electrical shock or damage. Use a soft‚ dry microfiber cloth to gently wipe the exterior surface.
Avoid using abrasive cleaners‚ solvents‚ or excessive moisture‚ as these can damage the display or internal components. For stubborn smudges‚ lightly dampen the cloth with water‚ ensuring it’s wrung out thoroughly to prevent liquid from entering the device. Pay particular attention to the display screen and around the buttons.
Do not attempt to disassemble the thermostat for cleaning purposes. Regular dusting will prevent buildup and ensure clear visibility of the display. A clean thermostat contributes to a more responsive and reliable heating system.
Battery Replacement (if applicable)
If your warm tile thermostat utilizes batteries‚ regular replacement is crucial for uninterrupted operation. The thermostat will typically display a low battery warning when replacement is needed. Consult your specific model’s documentation to identify the correct battery type – commonly AA or AAA alkaline batteries are used.
To replace the batteries‚ carefully open the battery compartment‚ usually located on the back or side of the unit. Remove the old batteries and insert the new ones‚ ensuring correct polarity (+ and -) as indicated inside the compartment. Close the compartment securely.
After battery replacement‚ the thermostat may require a brief reset or recalibration. Note that some models may retain settings during battery changes‚ while others may require reprogramming. Dispose of used batteries responsibly‚ following local regulations.
Software Updates and Firmware
Maintaining up-to-date software and firmware on your warm tile thermostat is essential for optimal performance‚ security‚ and access to new features. Manufacturers regularly release updates to address bugs‚ improve compatibility‚ and enhance functionality.
Most smart thermostats receive updates automatically over a Wi-Fi connection. Check your thermostat’s settings menu or companion smartphone app for an “Update” or “Firmware” option. Initiate the update when prompted‚ ensuring a stable internet connection throughout the process.
Avoid interrupting the update process‚ as this could potentially damage the thermostat’s software. Some models may require a brief restart after the update is complete. Regularly checking for updates ensures your thermostat operates efficiently and securely‚ benefiting from the latest improvements.

Warranty Information
Your warm tile thermostat is covered by a limited warranty against manufacturing defects. Coverage details and claim procedures are outlined in the included documentation.
Retain your proof of purchase for warranty service.
Coverage Details
This warranty covers defects in materials and workmanship under normal use for a period of one year from the date of original purchase. This means we will repair or replace‚ at our discretion‚ the defective thermostat. Damage resulting from improper installation‚ misuse‚ abuse‚ or unauthorized modifications are explicitly excluded.
The warranty does not cover damage caused by power surges‚ acts of God‚ or failure to follow the instructions in this user manual. Consumable parts‚ such as batteries (if applicable)‚ are also not covered. To qualify for warranty service‚ the thermostat must be returned to us with proof of purchase and a detailed description of the defect.
Shipping costs for returning the unit are the responsibility of the customer. We are not liable for any incidental or consequential damages arising from the use of this product.
How to Claim Warranty
To initiate a warranty claim‚ please contact our customer support team via email at support@warmtiletech.com or by phone at 1-800-WARM-TILE. You will need to provide your original proof of purchase‚ including the date of purchase and the model number of your thermostat.
A customer support representative will issue a Return Merchandise Authorization (RMA) number. Do not return the thermostat without an RMA number. Package the thermostat securely in its original packaging‚ if possible‚ to prevent damage during shipping. Clearly mark the RMA number on the outside of the package.
Ship the thermostat‚ prepaid‚ to the address provided by the customer support representative. Upon receipt and verification of the defect‚ we will repair or replace the thermostat and return it to you.